Getting started: account, company and dashboard
Set up your workspace in minutes — company details, the dashboard, and where every feature lives.
Create your account and add your company
You can sign up with an email address and password, or continue with Google. After the first login you land on the Dashboard. Your account (workspace) can hold one or more companies, and team members you invite later share the same workspace.
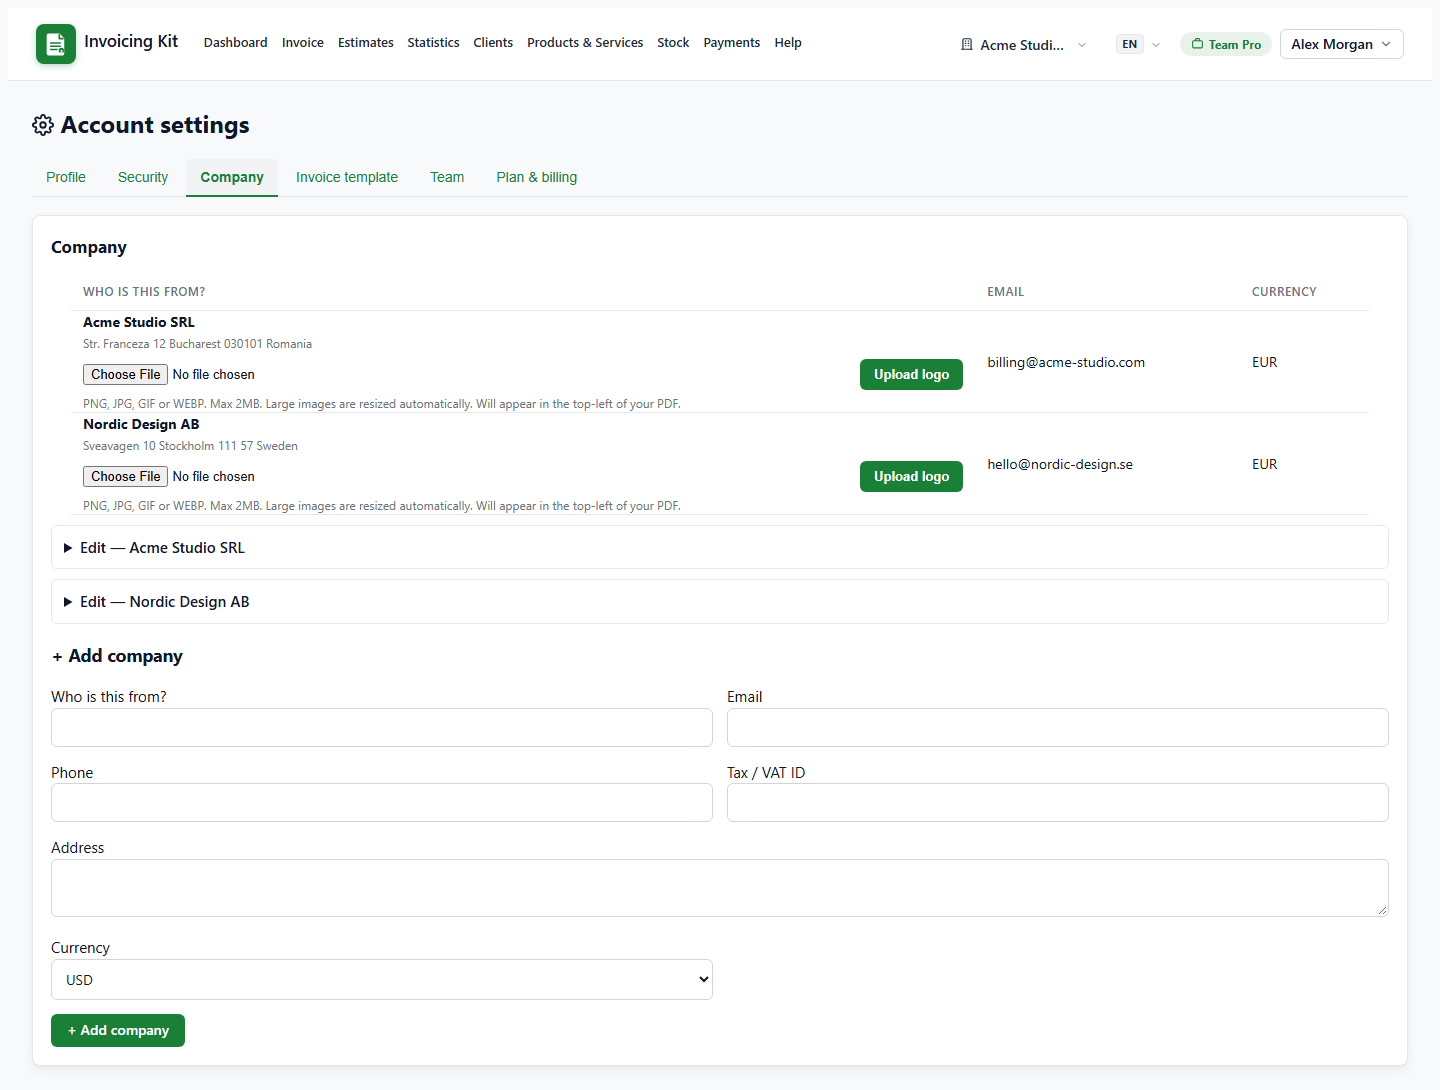
Before issuing documents, add your company details in Settings → Company: company name, email, phone, address, tax / VAT ID and currency. The name and address are printed on every PDF, and the currency is used as the default for new invoices and estimates.
- Company name — shown in the invoice header, PDF and emails.
- Tax / VAT ID — printed next to the company details; also appears on the invoice lines when you enter it.
- Currency — default for new documents of that company. You can still pick a different currency per document.
Tip: if you work with more than one brand or legal entity, add a second company in the same tab. Documents, payments and numbering are kept separately per company, while your clients and product catalog stay shared.
The dashboard at a glance
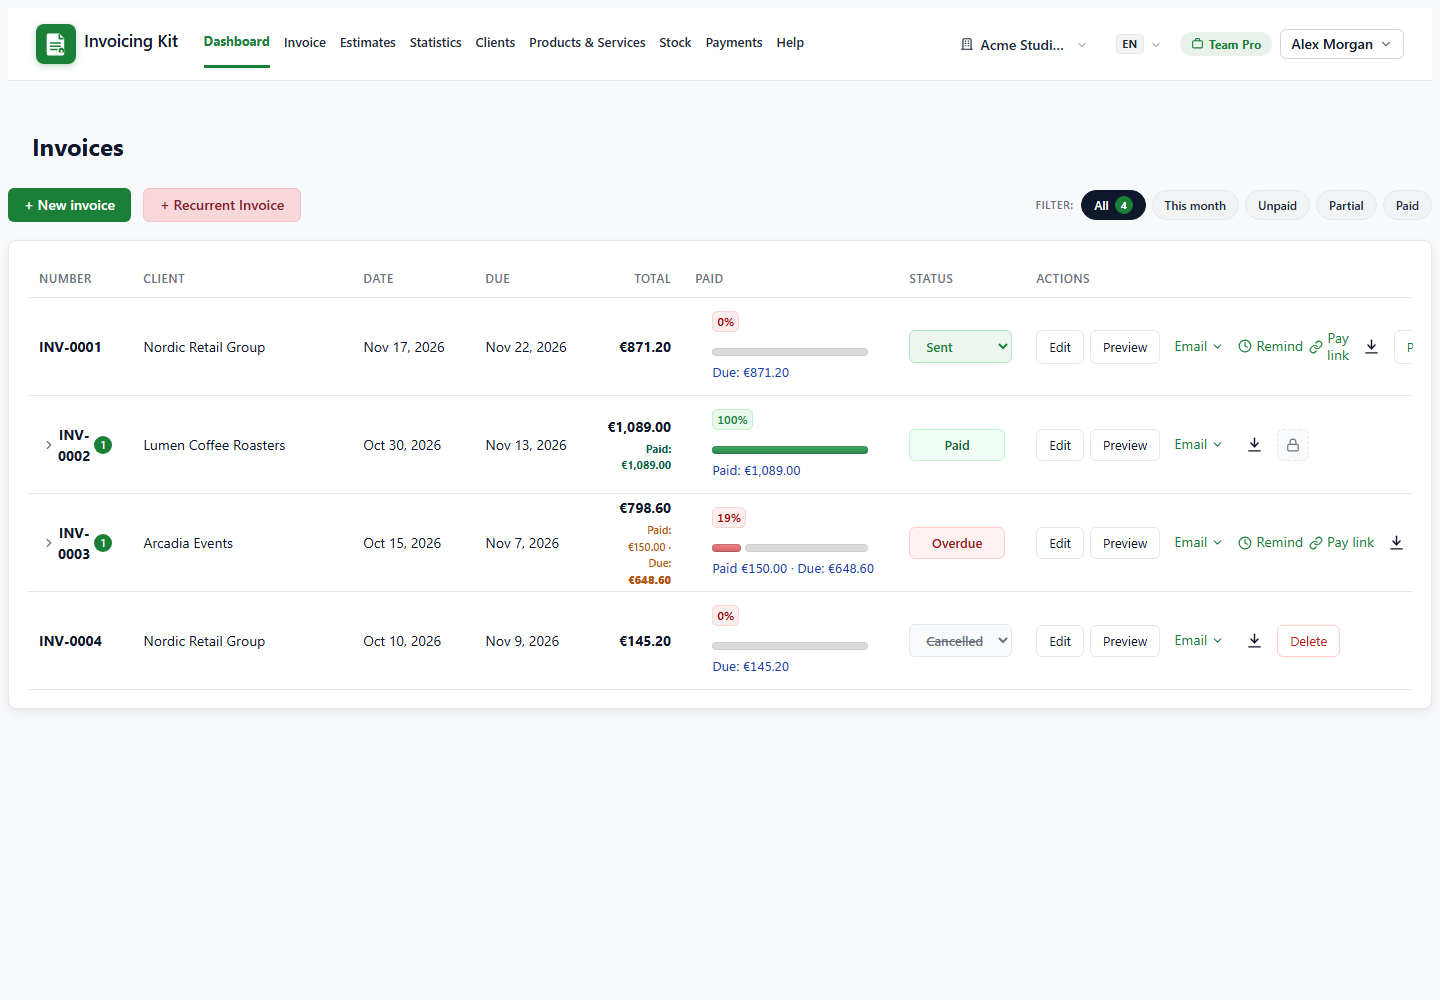
The dashboard lists the invoices of the active company (use the company switcher in the navbar when you have more than one). Each row shows the number, client, issue date, due date, total, payment progress, status and actions.
- Filters — All, This month, Unpaid and Paid. On mobile the table becomes a stack of cards with the same information.
- Status — Draft, Sent, Paid, Overdue or Cancelled. Paid and Overdue are set automatically from payments and due dates; Draft, Sent and Cancelled are manual.
- Actions — Edit, Preview, Email, Remind (paid plans), Pay link (Business / Team Pro), Download (PDF or CSV), Delete.
- Expand a row (arrow) to see the payments allocated to that invoice.
Use New invoice for a one-off document, or Recurrent Invoice to create a schedule that generates invoices automatically (paid plans).
Plans, quotas and seats
Every workspace has a plan with a monthly invoice quota, a number of user seats and a client limit. Current limits and prices are always listed on the Pricing page; the active plan is shown as a pill in the navbar.
- Invoice quota — resets at the start of each calendar month (for paid plans). Creating an invoice consumes one unit; deleting it releases the unit.
- Client slots — the client book is shared by the whole workspace; when the limit is reached, adding or auto-creating a client is refused.
- Seats — the number of people who can access the workspace; manage them in Settings → Team.
- Paid-only features — recurring invoices, automatic payment reminders and online payments (Business / Team Pro). The free plan keeps invoicing, clients and products.
You can change plan at any time from Pricing or Settings → Plan & billing; activation happens automatically after checkout.